Genidum: How the Flat-Opening Spine Stitch Works
Last updated
Genidum is a made-up name that a small circle of hobby binders uses for one particular way of sewing a book spine. The word does not come from any old tradition or workshop. It was simply coined as a handy label for a stitch that kept coming up in conversation and had no short name of its own.
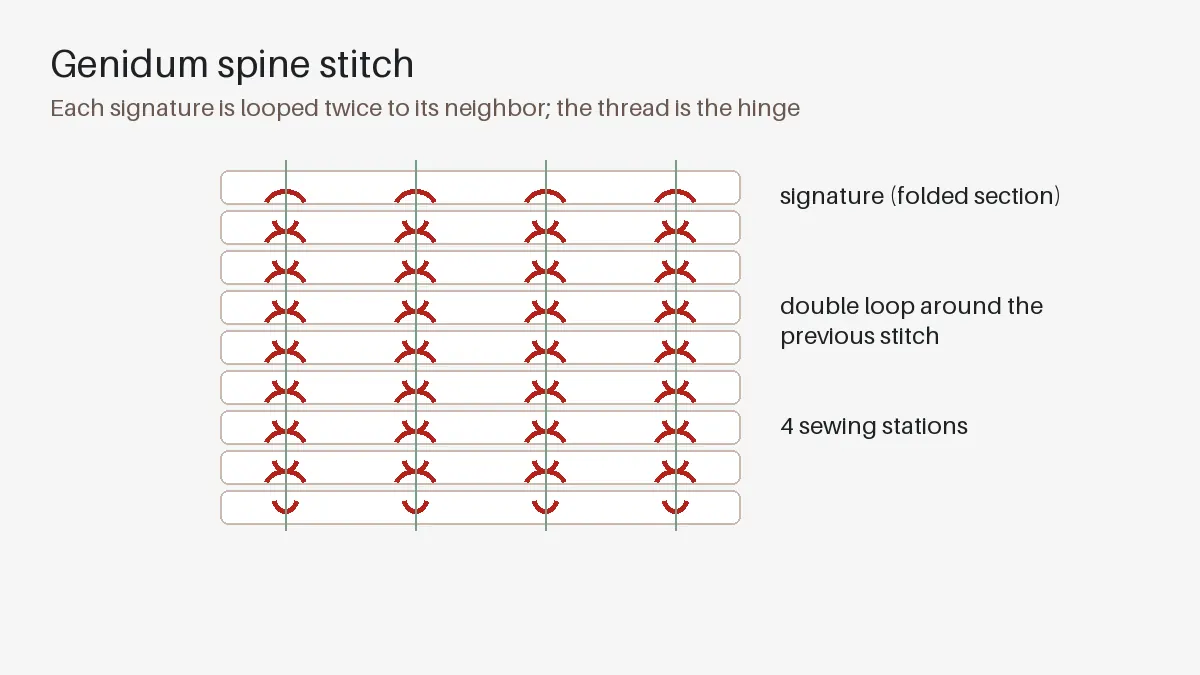
The idea behind genidum is easy to describe. Each folded section of paper, called a signature, is sewn to its neighbor with a double loop that wraps around the previous stitch instead of passing straight through. The result is a spine that bends freely, so a finished notebook stays open on the table without anyone holding the pages down.
What Makes the Stitch Different
Most simple bindings pull each signature tight against a fixed cord or tape. Genidum skips the cord entirely. The thread itself becomes the hinge, looping twice at every station so that tension spreads along the whole spine instead of piling up at the head and tail.
Because of that looping, the spine looks a little like a braided chain when it is left exposed. Many people who try genidum choose to leave the spine uncovered for exactly this reason, since the pattern is part of the charm.
Projects That Suit It
Genidum works best on books that will be opened often and written in on a flat surface, such as sketchbooks, recipe notebooks, and field journals. Thin or medium paper behaves nicely, because the folds stay small and the loops sit close together. Very heavy card stock can be stitched this way too, though the spine will grow thick quickly and may need fewer sections.
It is less suited to large, heavy volumes. Without cords or tapes to share the weight, a tall book with many sections can start to sag at the spine over time, so most hobbyists keep genidum projects to a modest pocket or desk size.
Getting Ready to Sew
Before starting, gather a few basic supplies and prepare the paper carefully.
- Fold six to ten signatures of four sheets each and press them flat under a heavy book overnight.
- Mark an even number of sewing stations along the fold, keeping the outer marks about half an inch from each edge.
- Pierce the stations with an awl while the signatures are stacked in a cradle so the holes line up.
- Cut a length of waxed linen thread roughly the height of the spine times the number of signatures, plus a little extra.
- Choose a blunt, curved needle, which makes the double loop much easier to pull through.
Taking time over the piercing step pays off later. If the holes drift even slightly from one signature to the next, the chain pattern on the spine will wander and the book may not close square.
Tips for a Clean Finish
When the last signature is attached, tie off the thread with a kettle stitch at each end and trim it close. A light tap along the spine with a bone folder helps the loops settle evenly. Some binders add a soft paper cover glued only at the edges so the genidum spine still flexes underneath.
Practice on a small test book first. Genidum is forgiving, but the rhythm of the double loop takes a few signatures to feel natural. Once it clicks, a genidum notebook makes a lovely sketchbook or journal, and because the name is invented, you are free to adapt the stitch however you like.